Showing posts with label Playfield - Construction. Show all posts

Friday, February 19, 2021

Daily motivation!


1) Steinman got his sign back! (I misplaced it two years ago... :') ) 


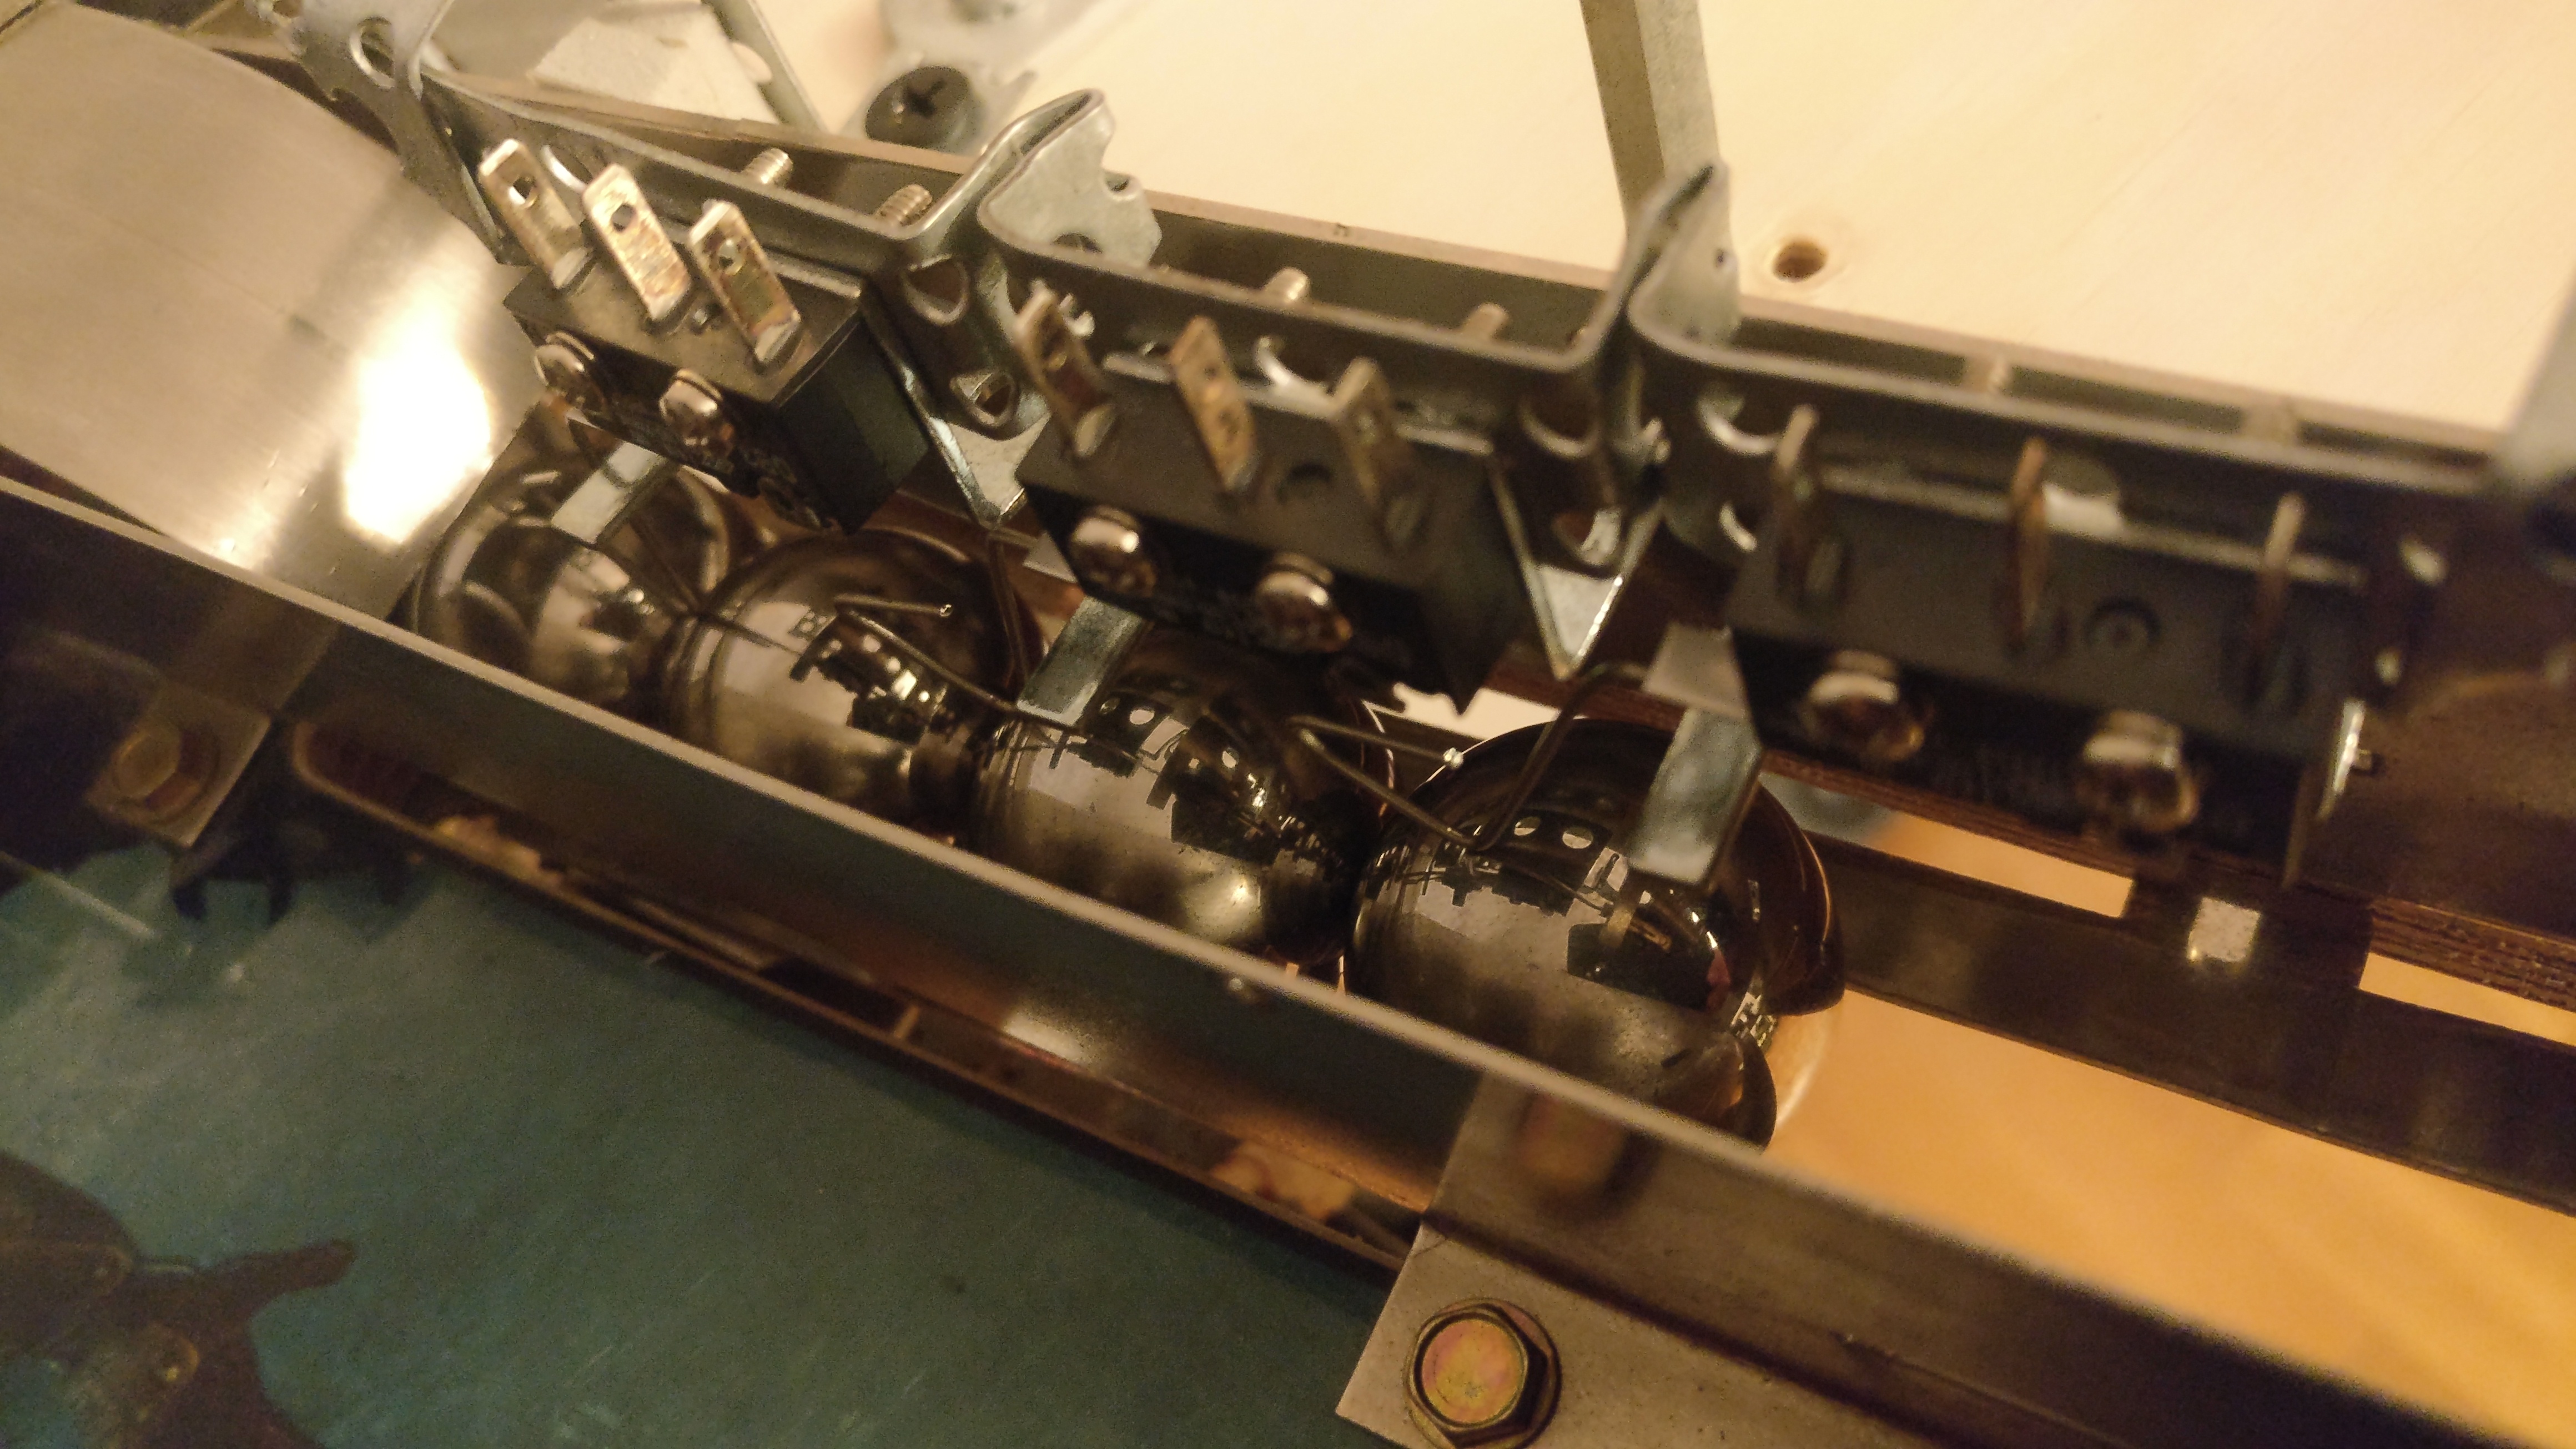
2) I really like this corner. The two-way quadtych-switch is pretty cool. 
Although I am toying with the idea of making it open/close via servo... 


3) Got the new ball through in place, although I'm still waiting for my new soldering iron.
But switches tested and works fine.  


4) Someone asked me why pinball machines are so big... Thing is - the playfield is pretty much
the same size under the board as above, so there's not a whole lot of empty space inside actually. 


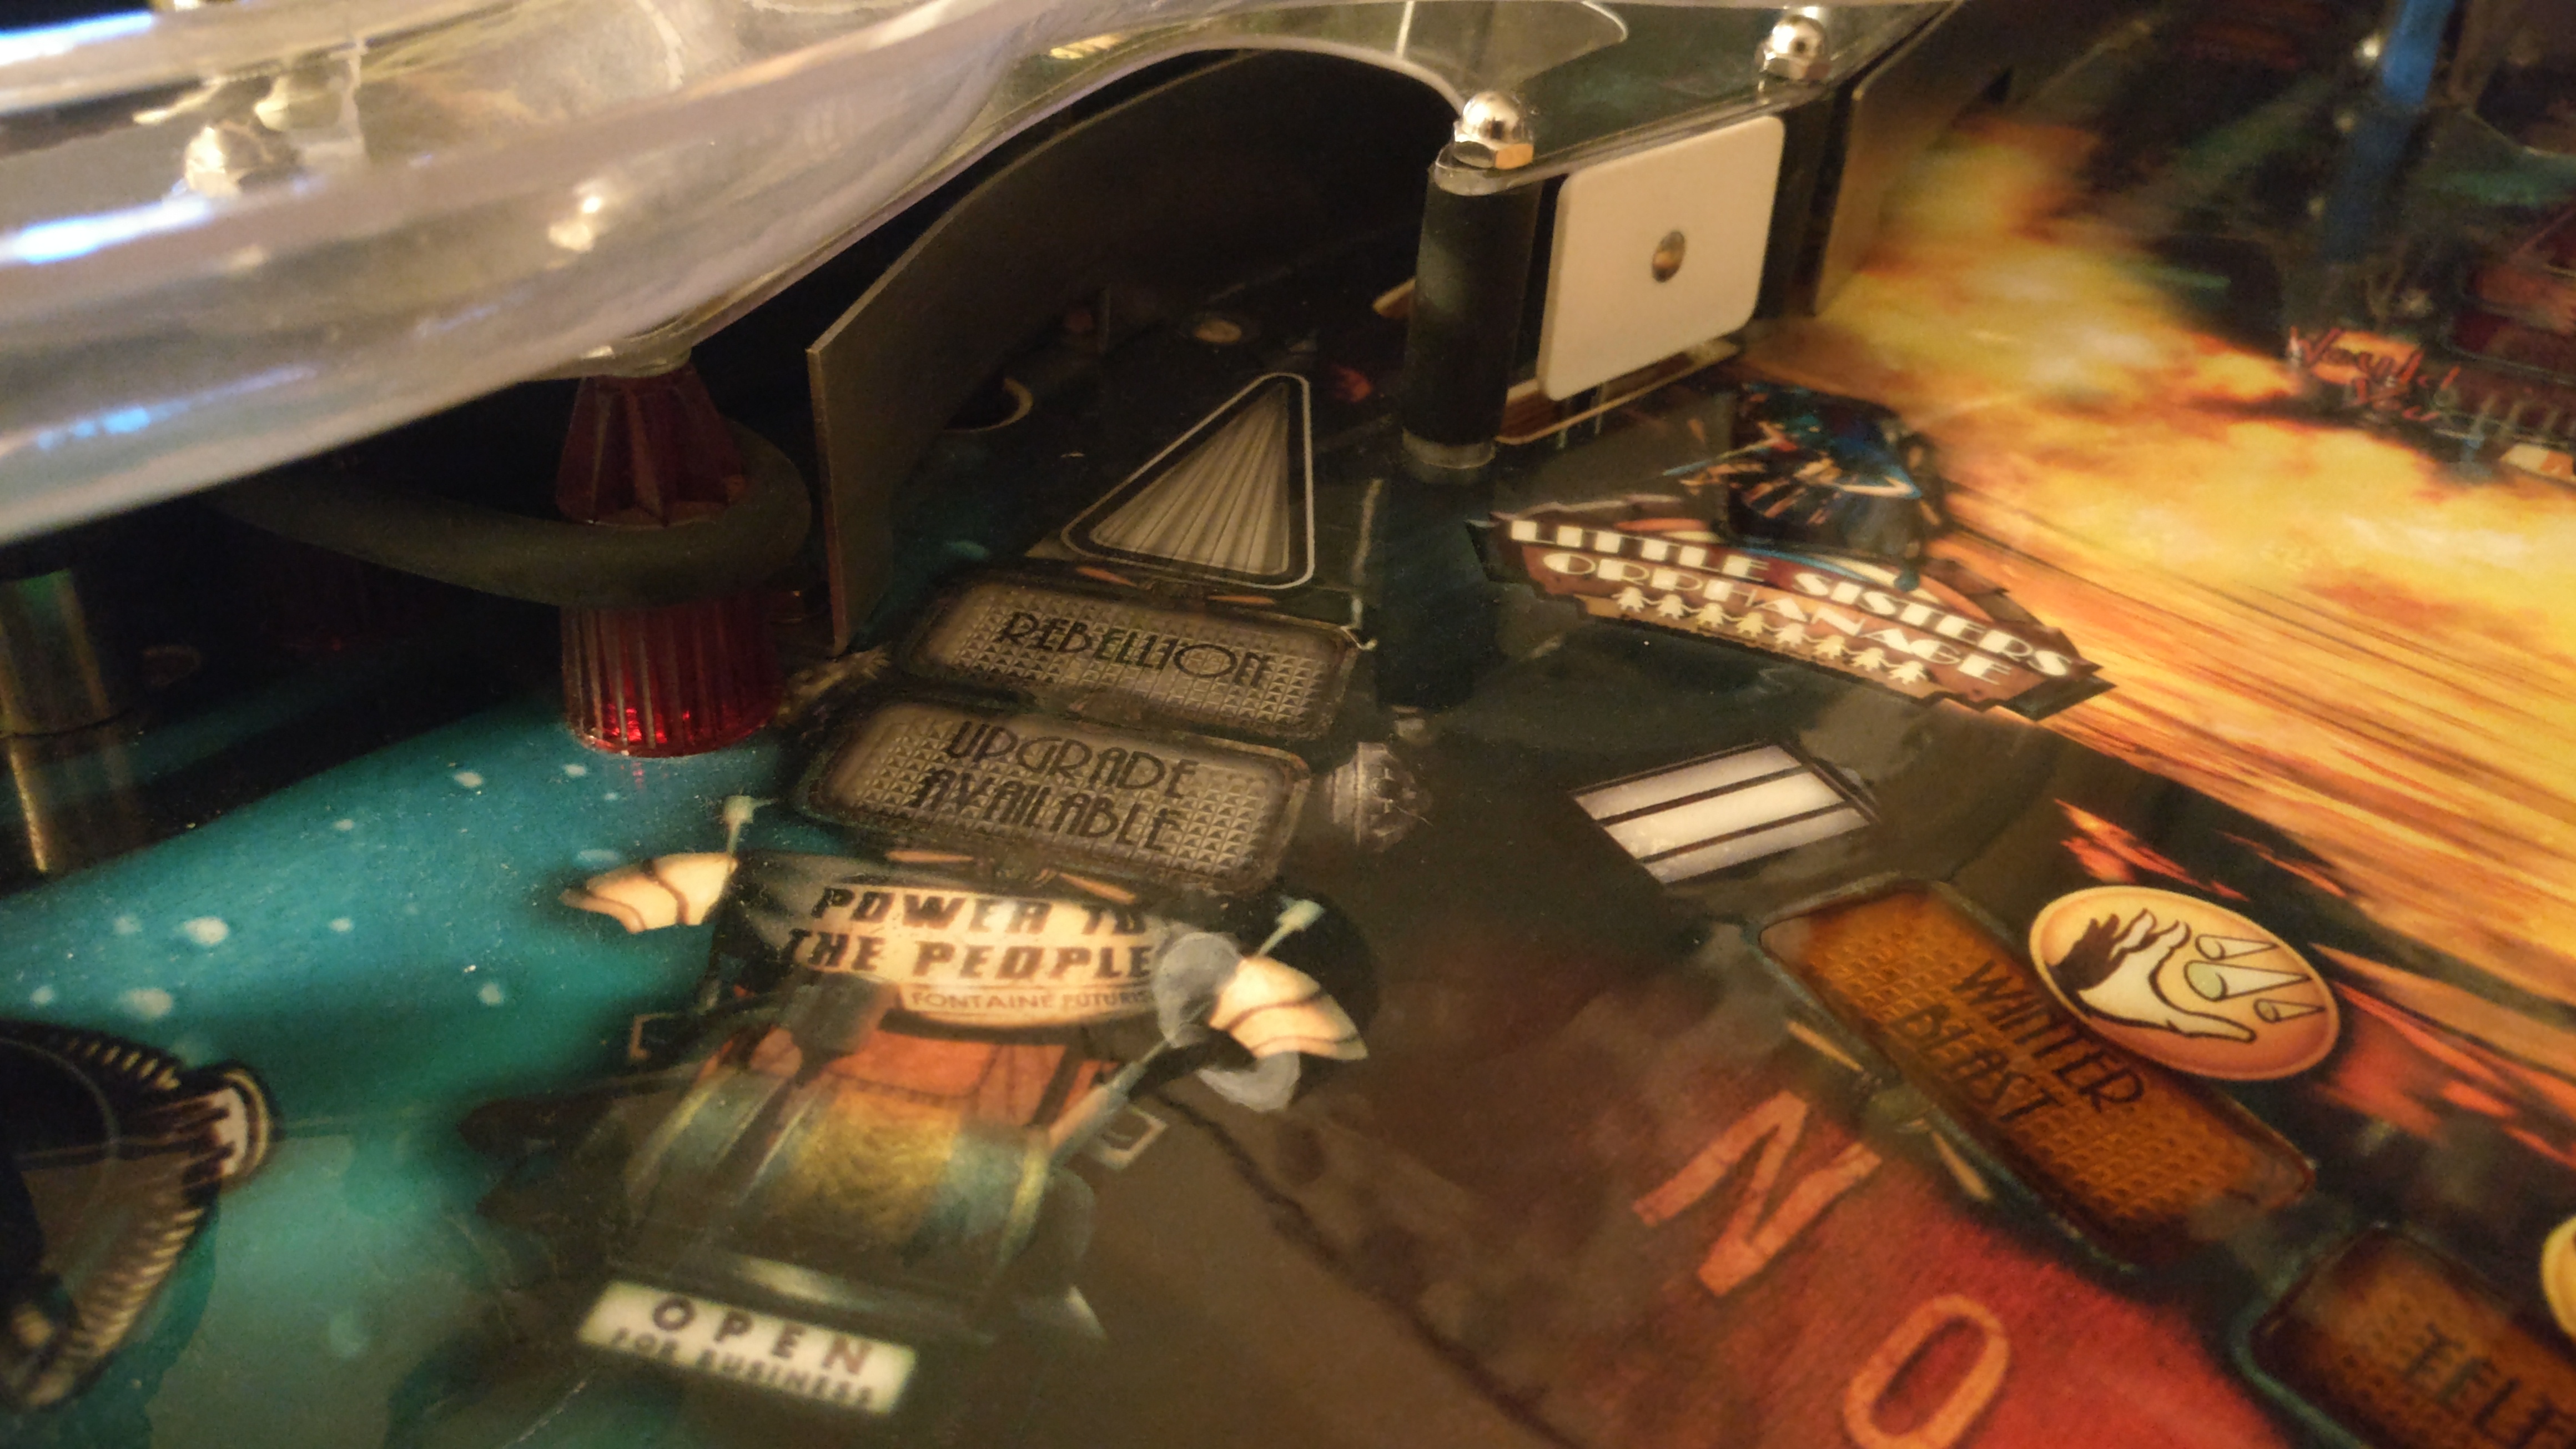
5) The plasmid saucer. I have not settled on the final behaviour yet, since it depends
on how hard it is to "backhand" the ball into this corner. But we'll see.  


6) Originally a captive ball, then thought to be a ball lock - and now "just" a lane. 
Kill your darlings, they say. Anyhow - it's a tricky shot so it should feel quite nice when hit. 


7) The upper playfield as it stands today. Looks pretty good, imho! 


8) A full overview of the playfield 2021.

I set out to make it look commercially made, and I believe I've
accomplished that as far as the playfield goes. Just need to make
sure the gameplay and rules are up to par!  

I really like that I've been able to make the whole 'miniature wonderland'-feeling
I wanted from a pinball. I've always enjoyed miniatures and the glimpse into another world
you can achieve with them. Can't wait until I get to play the first actual game! :)  


Monday, February 15, 2021

The devil's in the details... (is he really that small, though?)

Spent the last weeks writing rules and preparing each game mode with music, sound effects and overall flow of the game. It's getting quite complex (as it should be) considering the development time on the machine, hehe. Since I don't have room for more than one pin, I guess it won't hurt having a deep rule set either. Doing my best to stay true to the game(s) while having a bit of artistic freedom with each event, I think I've got a good chunk of fun and must-have elements in there. We shall see.  

I've corrected a couple of wrongfully connected switches and finally bit the bullet and replaced a couple of older cables for the targetbank that I left with the wrong wire colors - as I obviously connected them wrong anyway. All good now, though! 

I've also added a few more decorations and touch ups on the playfield - without further ado:

1) Mask for the Quadtych. The area was missing something and once the mask was in 
place the whole area did, as Sander Cohen said, come together.
 

2) Spinner "topper". There's a few iconic places in Rapture, so it 
felt nice to have them presented on the playfield as well. 

3) Party mask for the New Year's Eve ...ahem.. party. 

4) The "hidden" doll lane has been upgraded with a physical doll figurine. It's adorable. 
Might get a proper one for my kids, haha. 

5) Although not necessarily in the "correct" spot, the lower right area felt a bit bare - until now. 
The original plan was to have this cage around the center VUK, but it looks crowded enough already. 


So, all in all - things are moving along and unless - epic ninjas forbid - connecting the solenoids mess something up, I'm looking at a fully playable machine in the very near future!  

Monday, May 4, 2020

Rolling with the punches!

What's this... two post within a year? Yes - it actually happened! ;)

Been using my new found determination and time to keep working on the machine, finishing up bits and pieces all over. To start off - flashers, GI and playfield lights are now soldered up and working correctly.

Well, mostly at least.

I ran out of cables so I had to order more.
And I kind of ran out of output ports for the lights, so I'll have to hook up some of them to the AUX-ports I made on the board. (phew). But it's all good! 

1) All lights, switches and solenoids are wired/soldered!
2) It looks very messy, but the cables are actually measured and the "exact" length required.
I ran out of zip-ties, but will of course tie everything neatly when the new arrives.

As for input during menus, I've gone ahead and made the switch "box" that houses the menu buttons. It will be painted and/or covered with a left-over decal, but I'll do that once I've finished the building.

When not in maintenance mode, the red button will lower volume and the green button raise it. Pressing the white button enters maintenance mode. During maintenance mode red/green goes left/right (use can also use flipper buttons), while the white button confirms and start button cancel.

3) The early draft of a control-box inside/behind the coindoor.
Basically - menu buttons and volume etc.

I've also adjusted the syringe to be a little more reliable as a pinball toy and replaced the tiny LED with a proper pinball LED-bulb.

4) I replaced the standard LED with an actual pinball LED-lamp.
No more worrying about accidentally applying too much voltage!


Software-wise I've optimized loading and SD-buffer creation to utilize hardware interrupts for SD-card loading. I've used this a while for DMD rendering, but now I've managed to get it running on the SD-card as well.

So the loops are pretty tight now, which are very nice.
For instance - When sending new data to the DMD I process switches/solenoids etc in the small gap the display needs to stay blank. This is not uncommon among older games which did processing between scanlines (more or less). Works a treat and pretty much doubles the performance.

And now I've done the same for SD-loading, where I basically start loading 512 bytes, and as soon as they're done loading I schedule the next batch and start building the buffer with the 512 bytes just loaded. The unpacking is needed to convert 2K (half-byte per pixel) to a DMD buffer (byte per pixel). The SD card is slower than building the buffer, so that's the reasoning behind not loading the full frame from disk. Previously I built the buffer after all 2K was received, but now I've shaved of a few milliseconds by doing it while "idle". Very nice! 

I've also started the rather tedious task of converting away from Arduino/Chipkit's "String" class. It's ridden with bugs, memory intense and in fact - won't even run when compiled as O3 ("optimize for speed")... There seem to be a problem with the hardware watchdog resetting during optimized compilations, but I can't get my hands around why at the moment. Considering the standard/built-in libraries won't even run properly, I'm not terribly sure my code is the culprit here...

But first, back to the 80's we go; hello, C-string.

Monday, April 20, 2020

A Ferrari-style pit stop!

Got around to do a little tinker on the board the other day!

* audience cheers *

First - had to recreate the development environment on my laptop. Took a little while, but well worth it in the end. And, naturally, the SD card for audio (and the reader) had given up and didn't work. (...sigh).  A purchase of a new reader and a format later solved that. No big deal. But annoying.


Still a bit of wiring to do, but slowly getting there!
Switches, flashers and global illumination is now done, and with a little luck I'm done with the playfield lights in the coming days (or so).


I knew about this before, but I may have to increase voltage for the lights. Currently 5V is a bit on the low side, as lights are quite dim. To avoid using a lot of constant power I also duty cycle the GI, so I figure 12V would be ideal here.

Luckily; there's not a whole lot that needs to be done - either cut the 5V traces and connect the existing 12V line, or move the drive cables to a 12V port on the board. This can be done "any time" so if the board feels too dim during actual play I'll adjust accordingly. :)

Stay safe!


Thursday, July 6, 2017

It's all the mind

The progress as of lately has been mostly theoretical and the new PCB has been untouched.

Been really busy with life in general while the machine has been thoroughly playtested during parties, birthdays and integrity checked by my kids. It holds up, mostly, but there are weird bugs that I believe cannot be fixed in the current state. Weird stuff happens and cross-circuit spikes cause things to trigger wrongfully and what not, and for some reason you can sometimes no longer drain the ball when you're on the second ball. This occurs at random, and when it happens totally unrelated buttons stop working, such as the Start-button, and the debug mode for the lights starts etc. Wiring is alright, but as I wrote, I believe cross-talk or voltage spikes are to blame.

Anyhow;
I'm looking forward to four sweet weeks of uninterrupted work on the machine, which is when the new motherboard will be transplanted. Hopefully everything checks out and I can finish up the new wiring as well. Really looking forward to tidying up everything, getting the new code and video in place and get on with actual game programming!

Thoughts for another day;
Thinking about making the playfield artwork brighter, possibly remaking the artwork. But that'll be done once this playfield has gone fubar.

Monday, January 2, 2017

Big plans for this year!

Happy New Year!

This year will be about finishing the machine.
It's so close I can basically taste the highscores already!

But...  (unexpected, huh?)  ...I will also be remaking the motherboard.

I feel I've finalized all functions enough to create a proper PCB of the features needed. I will also add a few backup functions such as additional ports and other features that aren't necessarily used for this game. You never know...

I've tried several (trial versions of) different PCB softwares, including Eagle, PCB Express, DipTrace and one other I can't remember the name of - but the one that got my interest is Fritzing. Very easy to use, and perfectly fine for my purposes. It even has a breadboard and code layout in addition to the standard schematic and PCB-layout features. The production prices aren't the cheapest, but neither are any of the other software's license costs...

Read more about Fritzing here.

While creating the new motherboard, I will also transplant the location of the board into the head instead of the body. This is common practice in consumer pinball machines, and I can see why. It's basically impossible to service the machine without moving the glass, board and what not. It's also more or less impossible to troubleshoot hardware errors. On top of that, I'll rewrite most of the code as I now have a better understanding of the programmatic requirements of a pinball machine (which wasn't there to begin with - never seen the innards of one before starting this project! ).

I've played quite a few games now, and man - it's a difficult game! No risk of completing the game without proper practice, that's for sure...

1) State of the machine as of 2017-01-01. There are a few plastic signs missing here though, that have been broken in half during the years. But overall - it's looking very good! :)

Thursday, December 1, 2016

Double polarity LED's... who knew?

Oh boi. I'll just say it.
Shame on me - I missed a couple of diodes.

The bumpers and flashers were still "unprotected" and on top of that, the LED's I had installed were double polarity meaning they worked in both directions....  Who could have known, right?

The good news are that lights are now working somewhat properly (we'll get to that) and I've updated the main board with the correct lights and what not. This means I'm kinda back where I was before recreating the light board. And that's a good thing! I've also fixed sound and music, which had a few bugs that has stayed uncorrected since moving to the new system and board. Tried a couple of quick games too. 8-)


The bad news is that there is a slight flickering when a couple of lights are active at the same time. This flickering occurs on the light board itself as well, so it may be due to lack of power in the board or shift registers. I'm currently using a row/col based approach, which lights up to 12 lights per channel. I will try converting to col/row so that each row only ever power a single light at once. Hopefully that solves things.
 
I've also noticed that the servo handling the target bank was dead.
So I replaced it, only to find out that that servo too died after a few on/off's. The servos are beefy ones and are moving up to 5kgs, which is more than enough for the purpose, but somehow they die anyway. This last one has frozen in place, unable to turn, but it sounds like it's working. I'll have to investigate this further.

On top of that, the captive ball lane captures balls despite having no ball lock. The irony...

Code revision on the game will have to wait until the servo is corrected, as well as the captive lane.

But yeah, progress! \m/  

Sunday, October 30, 2016

It's not me, it's.... something else.

So, got my dirty hands on the light board and re-did the whole "extra board" thing. It still looks like crap, but at least now it doesn't glitch or have connectors that risk failing.

Then I realized, by accident really, that there was no ghosting to speak of in the board.
There wasn't even a problem with the board itself, besides the glitchy MOSFET, that is.
The problem is that somehow, don't ask me how, current is traveling back through the light grid/matrix and "triggers" other ports.

1) Light board only. No light cables or playfield connected. The camera had a rough time trying to photograph this, but everything looks just fine IRL. Crisp and sharp lighting and most importantly - no ghosting.

2) The very same light setup except that the power connector to the playfield has been connected as well. Behold - The mother of all double triggering, ghosting, annoying and downright irritating setup is created.
I don't know for sure at this point why this is happening, and it's rather hard to measure with a multimeter. Since it's using 3 MOSFET's enabled per active light it's also extremely/"impossible" to troubleshoot outside the cabinet. But here's what I got so far -

Everything is working perfectly with no extra cables attached.
Since the board has diodes from each MOSFET to the power lines and that the LED matrix on the lightboard is just that - LED's - current must be coming back through the very same power lines.
Unless I'm measuring wrongly, I'm also reading negative voltages on the ports that should be off.

That means the board _should_ work perfectly fine and that the problem should indeed be in the light matrix/series on the playfield itself.

Could I have connected something wrongfully? Possibly.
But still, I don't understand why it should be that - I got diodes installed on each lamp. So current can only flow in one direction, unless I made a mistake somewhere. But with everything attached there's just too many variables to investigate. Have to narrow down the search area...
I'll most likely troubleshoot this in a rather naive way -
By disconnecting all power cables from the playfield and adding them back one at a time (possibly with a diode as well).


Wednesday, October 5, 2016

Light and Sweet!

Finally got a little work done!

Not a whole lot, but at least lights are active again. :)
The ghosting is pretty horrible thou, but should be easier to troubleshoot this now since I have a proper load on the circuit.

 1) Long time since the board was lit up!
Looking forward to the day (hopefully soon) when I start re-labeling the lights and hopefully get rid of the ghosting. 

Saturday, July 16, 2016

Balls Be Lockin'!

Well, soon enough at least!

This is what I've come up with so far.
Should be fairly easy to manufacture; Five sheets of 10 mm plywood/board with standard drilling/sawing at most and a couple of 2 mm aluminum details etc.

1) Left: Open state. The holder solenoid bracket is spring loaded against the main solenoid plunger, and once the main solenoid triggers and the plunger reaches the endpoint, the bracket pushes forward and locks it in place. Right: Closed state. The holder solenoid and main solenoid is inactive and springs are doing their thing together with physics. When it's time to open I'll fire the main solenoid briefly to release tension, hold the holder solenoid while the plunger drops and then release the holder solenoid.
There are a few eyeballers here, but overall it should be pretty correct. The "fork" itself is based on a couple of bolts I have (with the screw part sawed off in the design) and they are a little shorter than I would like them to be. I will also have to double check that the ball won't squeeze through the gap. In case it does, I'll have to drill new or bigger holes in the playfield since the captive ball posts where 2-3 times larger than these bolts.

Should shit hit the fan, I got a couple of blue steel ramp flaps that can be placed on the playfield "floor" to cover up any unwanted holes. But I really hope it doesn't come to that! :)

Wednesday, July 13, 2016

This One's For You!

Woohoo, an update! ;D

Finished all diodes (I think) today, and got plenty of work done on the machine. For starters I moved the entire light board to the playfield for easier access and debugging/status checking. Unfortunately I realized that there appears to be some kind of error with the 12V line, as these are always active when one of the 5V LED's in the same column is active. I believe this to be a software issue as I cannot reproduce the error by powering rows/cols manually. Had there been any kind of short circuit that would have shown, I think.

The downside is that my programming environment is a very old laptop and for some reason I cannot compile code for Arduino anymore, so I'll have to use my desktop computer. It's quite cumbersome to setup so I'll put that to side for now.

Edit:
Actually, the row-MOSFET's are active when held low, so it's not entire impossible for the 12V MOSFET to be wrongfully and constantly grounded and therefor constantly active. In the schematics all rows circuits are the same and only the voltage differs. But maybe I connected something to ground "just in case" and since I've previously only connected the 5V line while testing the board, the problem could have been there from the start. I will investigate this.

Edit 2: 

Nope, that's not it. The board follows the schematic (who knew?!) and they're all connected identically. I cannot measure any differences between the functional rows and the erroneous either, so it's gotta be something in the code. Probably a clock pulse in the wrong place or something like that. Let's dive into manuals, yeay!  


1) Cluttered cable mess and the installed lightboard. The board sits on rubber pads and has extra support on the edges to prevent it from falling down, should it ever vibrate loose (not visible here).

2) Dimmed global lighting and example lightshow running. Note the erroneous red row that aligns with the green lights. No actual light has been plugged in at the moment since I need to work out the issue with the programming/board before applying real voltage across the playfield, but even then it's just 20 cables that needs to be soldered. Not a big deal at all.

Then I finished the one-way gate with double switching, meaning that it blocks shots from the front but registers hits, while letting balls from the bumper area pass through and still register hits. This allows for a greater range of options for game rules etc. I'm quite happy with how it turned out, even if the final form of the switchblade had to be reshaped ad-hoc since the nut was placed differently than in my "test rig".

3) More or less the player angle of the switch area. It's got a bit "last minute" to it, but hopefully it'll play alright and the benefits are far greater than the possible visual aspect of it. But honestly, I think the Quadtych deserves to be a visible part on the playfield - and now it is.
4) Birds view of the switch area. The metal rail in the bottom (i.e playfield right) was bent with a nice fit. The original part was just too short and I was tempted to put a pole between the bumper and the rail, but then I found a slightly longer rail in my "box of random parts" which worked perfectly. Guess I've been racking up some karma points at least... :) 

5) Switch close-up. Took a bit of fiddling to get right, but it works great. Hope it keeps running smoothly in the future too.

 Lastly, I've begun work with the ball-lock / up-post thingy.
At the moment all I've done is removing the old captive ball and modifying the plastic overlay slightly to better show the locked ball.

Next I plan to construct the actual ball lock device itself, where the problem today is two fold;
Firstly there's the issue of attaching the holder solenoid to the main solenoid. I need to find a good material that I can process without heavy machinery. I'm thinking a thin(isch) sheet of aluminum should work. Plan B is to construct a plastic placeholder while I think of something else. I'm refraining quite severely from purchasing new parts at this stage, but if I have to; well, I have to.

Secondly, the "fork" I was planning to use to hold the ball was of a wood screw type and is unfit for mechanical use, so I'll have to find an alternative for that. I don't think I can use an official Stern (or similar) ball lock as the space is very limited where I'm installing it. At least in the blueprints I've looked at it looks too big.

Well, that's all for now. Hopefully I'll have functioning lights and a ball lock next time! :) 


Monday, March 14, 2016

Through The Gates of Hell

Here's a quick preview on the test version of the one-way gate.
It's not nearly as slimmed as I would have hoped, but without special wire bending tools it's impossible to bend smaller angles. The wire is tough!

1) Partially assembled gate.
The gate has changed since this photo was taken, will post update soon.
2) Position on the playfield. The switch registers hits from front and back but
will only allow balls to pass through from the bumper area.

Thursday, March 10, 2016

Nothing bad...

...that doesn't bring any good, right?

Having some forced time-out from soldering made me focus on game rules instead, and it hit me -
I'm not done with the playfield just yet.

I have a one way gate planned, which actually was planned for but never made it to the "final" playfield because of time and technicalities. The gate would be sitting between the vent and motorized targetbank, preventing direct shots (or at least partially) into the bumper area. I might do a half gate to allowing less-than-direct shots to pass/bounce into the bumpers thou. I did work around the lack of a gate by blatantly pushing The Masterpiece and New Years Eve-corresponding actions up one floor, to the upper level. But this way allows me to use my original ideas which, quite frankly, sound a lot more fun!

I also found a spare flasher that I can place somewhere now that I got plenty of free flasher-channels. I'm thinking it would be a cool effect to put it behind the Big Daddy and possibly killing all lights and strobe that flasher during his awakening. The shadows should be pretty cool and the effect of the red eyes in the dark would be nice too!

The next part is getting rid of the captive ball and replacing it with a ball lock, similar to the one i recent Stern games such as Avatar, Rolling Stones or X-Men. It will be a tight fit, but I have all the parts and just need to Frankenstein them together. The best of it all - it costs me more or less nothing, and is more or less a matter of screwing things together.

This should be the equivalent of taking a bathroom break on a road trip, so nothing major. While waiting for my soldering iron replacement to arrive, there's not much else I can do. :)


Tuesday, March 1, 2016

Research!

As a friend told me - I really should have done a little research before soldering away...

Anyhow;
The problem is easily and cheaply fixable.
And it will be fixed properly and according to how pinball machines are supposed to operate.This picture blatantly stolen from Marco Pinball pretty much explains everything needed to know.

1) Lamp socket with diode attached. I'm frankly a bit ashamed I didn't research the purpose of the extra lug when I checked the connections....


What I did was soldering my ground cables directly to the outer pin, efficiently bypassing the design of the lamp holder. In other words, I did exactly what this image told me not to.

2) The problem explained in detail. On my machine the row and columns are "swapped",
meaning power is coming from the rows and columns are ground. 


The solution is pretty easy to put in place, so now I'm off to shop for a bunch of 1N4004 diodes - which, luckily, are very cheap compared to the the cost of converting to all-LED... 

Saturday, February 27, 2016

We meet again, Captain Setback!

I was having a great time soldering new light cables and everything went smoothly... I thought.

1) I was happy. Until I tested the circuits...


Introducing, in the red corner - The Problem.


2) A typical layout with two power lines and two ground lines.

In the picture above, connecting Power 1 and Ground 1 should light up Lamp 1. The problem is that since I don't use LED's, which are single direction only, but lamps/bulbs in most locations, powering that line will also light up Lamp 2, 4 and 3 (in that order). Basically it's a grid of interconnected lines so "everything" lights up simultaneously. Doh.

...and in the blue corner - The Solution(s).

I planned the matrix layout based on LED's, so the easiest solution would be to simply replace all bulbs with LED's instead. That is rather expensive however and I really want to keep it "lamp-agnostic" in order to use whatever lamp suits the most.

Another possible solution would be to use current restricting diodes on each ground and power line. Slightly less expensive and should be quite easy.

The third - and here's where my hope lies - possibly solution: Using the light board's built in current restricting diodes on each ground and power line. However I'm not fluent enough in electrics to know if a single diode at the end / start of each line would be enough to keep current going in the right direction all over the playfield. I only know this once everything is hooked up, and I have roughly half of the ground cables left to solder, and in case I need to adjust something I'd rather do it now than retrace my steps later.


The million dollar question: 
Is it enough to "correct" the current direction at the start and end of each line, even if the cables are not drawn in series, but rather branch out every now and then? Would the, say, blue chain above benefit from a diode between Lamp 2 and Ground 2? Would the diode stop that from happening since that line is still connected to the diode?

Or would the current pass on from Lamp 2 to Lamp 4 regardless?

Edit:
I've found a great tool online to troubleshoot circuits. Using this (which I assume is rather correct) I can see that it won't work with a single diode. The current would still pass in the other "legs".
I will see what the best solution would be, but right now I must say changing to all LED's would be preferable... :/

Check for yourselves here:
Lamp/Bulb based:  http://tinyurl.com/jk38dwm
LED based: http://tinyurl.com/gvbssy2


Tuesday, September 15, 2015

...Chop-shop!

I've gone ahead and started butchering the light cables.
And I only killed seven switches in the process...

Man, it kinda hurts...but it will be all worth it when finished! :)
I will be able to say "light #5, that's red/blue" and see if the problem is the bulb, the board or MOSFET's etc. Troubleshooting will be a lot easier!

1) Old cables removed and the new ones await installing!

2) They don't look much, but will mean the world to Mr Bubbles!
I might need to order another batch of cables thou - apparently 60 m isn't enough ...

Friday, July 25, 2014

Clogs of War!

After playing a couple of games, as well as letting "outsiders" play,  I'm pretty confident I need to improve the ball through - or more precisely, the drain. Sometimes if the balls drain too fast during multiball (hey, don't judge me!) the balls pile up and the old school drain can't keep up with the pressure. The balls on top pretty much prevents the drain from clearing and the system has to be unclogged manually. The drain I'm using was only designed for single ball usage, so the joke's on me for trying to adapt it. ;)

I'm thinking I might need to fully replace it with a modern one, but I guess I'll try to improve the actual drain first so that only one ball at a time might enter. The downside with getting a new one is the rather substantial cost, so I'd rather avoid that as much as possible. But it is a problem at the moment, since the game has trouble counting balls as well if the drain doesn't function properly.


1) Top playfield with some lights active. I really enjoy just starting the game, seeing everything light up and playing a game. Even if it's not programmatically finished (by far) it's still very enjoyable! Shortly after this pic thou - Mr B's arm fell off... Will need to fix that.

I've noticed that programming the rules aren't all that trivial - even for an experienced programmer there's a lot to consider, especially when breaking it down to simple parts. Take a function that should raise the up-post when doing a left loop. How should we define a left loop? During single player it's easy, but during multiball it gets tougher since you can't simply compare it to the last switch and determine the direction from that. Well, it's somewhat doable by having a rule set that ignores faraway or unrelated switches etc, but still it's something that I've underestimated. I've also noticed that keeping track of all features and modes to prevent them from interfering with each other is rather cumbersome. But at least this can be improved upon without doing any major "surgery" - just open the front door and plug in the USB-cable. 

Furthermore - I really wished I didn't place the electronics under the pinball table... When the time comes for upgrades other than actual programming, such as music, sound or videos, it's a rather big operation compared to just removing the translite on a regular machine... But done is done and now I've tested that. Won't do that again!

Tuesday, July 22, 2014

Days of future past...

In the essence of 'two steps forward, one step back' I've spent most of the day figuring out why all of a sudden some switches stopped working while playing a game but working flawlessly in the diagnostics menu.

Turns out I did a little sloppy coding that overrode the later functions...Whoops.
All fixed now thou! 

I've also replaced the switch in the center VUK to one that should be more robust. The downside is that it can only detect if a ball is entering the VUK, not if there's a ball in the VUK. This shouldn't be a problem if the VUK functions normally and if it doesn't - the ball search will eject the ball anyway.

While working continuously on the machine it's somehow second nature, but being away from the hardware a while really gives you respect for the amount of wiring and work that has gone into the machine. When time comes to do hardware maintenance it's really a case of inventing the wheel once again. And this is despite all my attempts to keep everything neat and organized / documented.

Just a reminder of what it looks like under the hood...
1) Oh, the joy of troubleshooting this... I still don't know why the magnet works now and why it didn't a while ago. I just close my eyes and pray that it works every time I've tinkered with the playfield.


...which is somewhat forgotten when the hood is closed.

2) Players view. Somewhat. At this point, with the glass and all - it really does look commercially made!
The translite is, obviously, not a very tight fit but I intend to put some small edges around to prevent light from leaking out. It's also missing the metal side protectors at this point.


It's a beaut', ain't it! ;) 

Friday, July 18, 2014

Glass house and rocks!

Hi guys!

I've been extremely busy since the tour with promotion and work with the band, but I have at least put the glass on now and re-seated a cable to the plasmid saucer. This also (miraculously) fixed the magnet that I deemed to be broken a couple of posts ago(!). Weird!

Anyway - to try to make up for my lack of updates, I'm posting not one, but two videos of the playfield. One idle playfield overview and one where my girlfriend plays a game. The software is running in debug mode, so the lights flicker a bit (due to low refresh rate) and there are not many game rules in play so the game seem more sluggish than it is.


I've also concluded that I must shrink the gap in the right outlane...that thing is ball hungry.

Sunday, February 16, 2014

State of the Machine

The past few days I've been able to focus a little on the machine, which is always nice.

I've added three switches that were missing - top drophole, upper shooterlane and the last ball through switch. All three very crucial switches that were somehow forgotten to be added or simply to complicated to setup.

1) Upper drophole switch. Not the nicest setup in history - but considering I forgot to make room for it during design and it's extremely tight to work in that area, it looks all right and is not visible from a players perspective. (I really need to clean the board before putting on the glass!)

I'm about to rewrite the ball handling code now that I've got more (and more accurate) ways of detecting the balls so instead of "it's probably launched now" I can actually know for sure if a ball has been launched successfully. 

I've also added a little bit of decorations here and there and the machine is almost 100% physically complete. What's left is a couple of switches that needs to be tweaked after a couple of games to make them behave reliably and easier to read titles on the inserts. I have printed out new titles in white that needs to be applied before putting the glass on. Preferably.

A message system has been added to send the player small messages (or large) to hurry up or if a ball gets stuck, failed to launch and so on. The smaller one is more informative and overlays the current screen while the bigger one covers the entire screen and is meant to present more mode-related messages such as "JACKPOT!" etc. I've added a couple of modes as well such as EVE, Rapture, DNA / ADAM frenzy, JACK in order to get the game programming started. It's nice to have the machine "talking" back to you while testing!

Here's the current state of the machine.
Those of you who's been following the blog for a while probably notices a few new pieces...

2) Current state of the pinball machine.