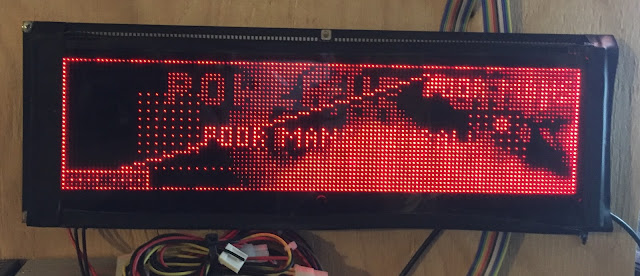
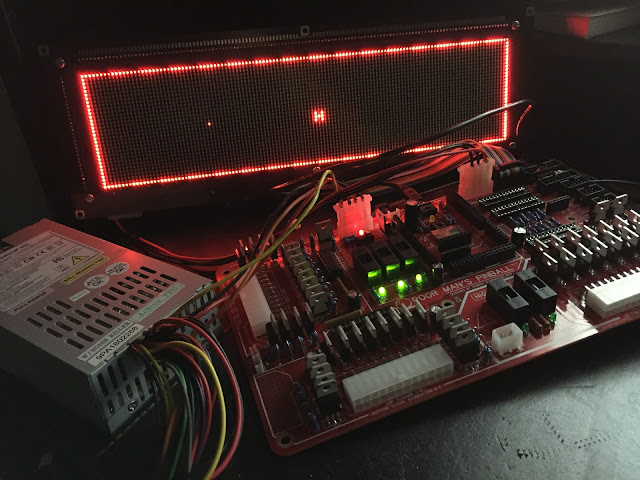
Showing posts with label DMD - Animations. Show all posts

Monday, March 29, 2021

Setting myself up for success!

Still tweaking and improving on the general flow and function on the machine. 

I found out that I could have one more interrupt "loop" attached beside the one I've been using for, well, mostly everything - so I've migrated to using two separate loops for display and switches etc. 

Doing solenoid and switch updates at 1400+ Hz turned out to be a bit overkill, so by separating screen refresh from that loop I could increase frame rate while still keeping a solid 200 Hz refresh rate on solenoids and switches. This is more than enough to dim/fade lights and from what I can tell, I haven't been able to *not* register a switch hit.   

The downside is that code is somewhat more complex (servos in particular has proven a bit challenging, since I obviously struck gold with my magic numbers the first time...) but I'm getting there. Getting all time & counter values updated took a while too, but now I got TIME_1MS variables to use that are exact and not "40 loops", which can be whatever... So it's all good. 

Basic gameloop as in start game, play game, end game, award match or highscore etc is in place. Not "final" but in place. And that's quite a relief - and this also means that for the first time in YEARS I've actually progressed further than I've ever been. *optimistic fanfare* 


1) Highscore is in place, both reading and writing to EEPROM - and of course, earning them in-game.
The eagle eyed might notice a slight ghosting. This is due to insufficient wait time during display-enable/disable cycle, but I'll get that fixed soon enough. I might even revisit the DMD rendering routine eventually to see if it's the most optimal version. I'm not terribly sure the timing is 100% when reading the documentation for the display, but it can't be far off either.   


2) Various stats are being recorded and available to view in the audit menu. Beyond being interesting I plan to use the data to decide if a feature is too easy or too hard, balls drain to fast etc. 


Luckily the audit stats are getting reset eventually, since ball times aren't exacty... spectacular... during testing... :) 

I've also added a lot of settings that can be tweaked, including ball save time, lamp brightness, coil power, hold start to launch ball,number of hits required for this and that. Each setting comes with a type of setting that is rendered differently such as slider ("volume bar"), cycle values, on/off, yes/no and so on. I've also added the possibility to disable certain features of the game, for instance - if the drill-arm breaks it can be disabled so the game won't try to run it etc. I'm trying to plan ahead and add as many settings I can (and since it's simple to do - why not) that allows for greater flexibility when designing the game. It would be great if some years down the road the machine won't be completely inoperable in case of mechanical failure of some part. Most professionally constructed machines compensate for broken switches and machinery, so I'm trying to be at least on par. 

But...

I'm at 62% flash usage already. 
Hopefully actual game rules won't have to be just random points and sound, hehe.

I'm not expecting and issues really, since most of the heavy lifting is done with all the various classes, mainframe and scene management. Game logic is relatively simple, after all, and worst comes to worst - I could probably offload all maintenance names and text to EEPROM and stream in when required. It should free up a few KB of valuable space, at least, and if necessary I could also squeeze out a few more KB by using binary values for letters and numbers instead of having a byte per pixel. That means I won't be able to use per pixel colors, but I'll cross that bridge if I ever get there. 

All in all, code is shaping up pretty nicely! 

Friday, March 19, 2021

Down for maintenance...

 ...is something you might say during maintenance. :P 

Almost got all parts of the maintenance modes down by now.
Naturally, I will have to keep coming back to update certain features as the game programming goes on, but I feel most of the menues and how everything works feels pretty good. 


1) This menu will be super handy if something doesn't work as expected! Here, we see that the watchdog is disabled (due to open coindoor), and that in turn disable power and solenoid+flash MCP's. I'm thinking of enabling a "secret" debug menu that adds this screen and others as overlays during gameplay too.

One of these days I'll update with a video, hehe. 


Sunday, May 10, 2020

Holy optimizations, Batman!

Spent a "little" time optimizing the code base, along with actually trying to work out the kinks of why optimized mode doesn't work. I'm not all the way there yet, but the results so far are very nice! 

Note: The flickering apparent in both videos is mostly picked up by the camera only and isn't really noticeable IRL, and the refresh rate can be pushed up further. Just keeping it a bit "low" to avoid confusing myself while debugging the rest of the code in case it causes crashes/erratic behavior etc.
For instance - 
Here's a clip of SD-card videos running as fast as possible in the old code. 
Notice the slow motion (faked by frame-skipping previously, removed here). 


And here's the same clip after optimization. 
Compared to the old version, it's a lot smoother and I'm actually running the videos at 40fps here (faster than original 30). Notice the long blank space between the videos, where the old version barely finished rendering the first one when the second one was timed to start. :) 


Some crude counter increments:

Previous one-second count: 28402
New one-second count: 91857

Quite the improvement! 
Very satisfied with the results so far!

In case you didn't notice, I used two simultaneously running SD-animations (background & fx) during the second video. Works great and allows me to spice things up. #thumbsup 
And the cable mess have been mostly corrected now, all lights tested and working. :) 


Monday, January 22, 2018

Mostly Behind The Scenes

What is up, Internet!?

Most of the work at the moment isn't very visually interesting, but I'd thought I'd share a little snapshot of the current (messy) state of the debug screen. What I'm verifying here is that the various conversion and positioning functions are functioning properly. Which they are.

On top of this, I've fleshed out the switch callback handling, which includes buffered and queued switch hits. This allows the best of both worlds; the interrupt routine can register switch hits as fast as it can detect ( 1000+ > Hz per switch) while the game loop is chugging along at 40Hz. So no switch hits are missed, and the response for each hit is a maximum of 25ms late. Certain switches such as flippers, slingshots and bumpers are allowed to trigger the corresponding solenoid immediately and allow the sound and gameplay events to happen "later". It might be possible to queue sounds right away since the serial out is asynchronous, but I have yet to test this. What ever decision is made has to manage up to 8 simultaneous switch presses so each response must be pretty tight. I don't want the machine to run fine during single ball and crash during multiball etc. :)

I've enabled printing a copy of the internal switch matrix and the current animations, lights and so on in the console maintenance mode, which is guaranteed to be correct at all times unlike an offline version in Excel, for instance. On top of that I have started work on the state machine for modes and various scenes, so things are progressing nicely, albeit slowly!

1) Development board with debug options enabled on the DMD. I've also created a "overflow" function for scores,
so that any score larger than 999 999 999 will be visually divided by 1000 and rendered correctly. I believe this is how newer tables by Stern work, unless I'm mistaken.

Monday, October 16, 2017

Weirdness and wetness!

Spent some more time with the code and got dual animations on a single SD-card up and running!
It's an unlimited number really, but limited to two for performance. The theory is simple, since I'm not using a file system I simply load raw sectors and can grab any frame at will.

For simplicity and synchronicity's sake, I've decided to load SD-card animations with a blocking approach (as opposed to interrupt driven). This greatly simplifies things as I can keep the main loop/scene rendering to a single function instead of spreading out across several frames and wait for various inputs to complete etc. Since switch inputs and all I/O in general is moved outside the main loop, it doesn't matter really. I've locked the main loop to 40Hz which should be plenty for updating animated text, verifying animations and other non critical reasons. 

1) Basic render "geometry" examples with background animation, textlayer and front animation (layered above the text-layer).
The lower left are status flags for SD card, MCP, ULN etc. All 8 should be lit for a 100% functional machine.


The extra FX-layer really spice up the DMD, since I can overlay smoke, sparks and what not at will. I could also use two background layers, or two front etc.

I've also found a way to successfully detect if ULN and MCPs are functioning correctly, and can alert and disable features accordingly. I've completely lacked this troubleshooting feature previously, so this is a major leap forward.

I've also had the "joy" of realizing that the flash-burning sometimes fails, and that verification fails. It has been like that for a while, and I never knew why and it has "always" worked. But this weekend some simple code started to fail seemingly randomly and it basically boiled down to 'if verification fails, the upload isn't correct' after all. Usually a reboot or reselecting the toolkit in UECIDE allow me to upload successfully. As long as I know about the issue I can work around it. It wasn't exactly a straight path trouble shooting it though, since I both suspected that the DMD was broken. I took a rewrite of the routine in a new sketch to see that it was indeed working correctly. A new screen is _not_ something I want to buy at this stage...

But on the plus side the 13h+ troubleshooting made me rewrite SD card and DMD rendering routines, further optimizing them and avoiding unnecessary variable writes and operations. The downside is tough-to-read code, but once in place they won't change often (at all?).

So - three steps forward, one temporary step back.

Thursday, October 12, 2017

ULN2803A!

1) Fully populated board with everything up and running. Since this is my first circuit board ever made
and my first venture into advanced electronics, I'm very proud to see it functioning properly!


Yes!
It was a broken ULN2803A that was the problem with the light matrix.
Very satisfied with that little bit of knowledge, as this now means that all parts of the hardware has been checked and verified. Now it's simply a matter of fine-tuning everything and create, solder and connect the final cabling.

Exiting times to say the least! :D 

Sunday, October 8, 2017

DJ SD is in the house!

...SD card loading is in! 

The graphics library is still in its infancy, so there's no shadows etc. But all-in-all I'm pleased with the results!

1) DMD with SD-card loading (and displaying) demonstrated. The 16 shades shows the possibilities pretty good here,
with a dark big text in the background, several layers of graphics etc. Once shadows are in place it will be killer!


Friday, October 6, 2017

We shall rebuild!

Getting closer...
I've been struggling getting the light matrix to run properly, since all rows are for some reason active at the same time. I'm thinking the ULN2803a is broken, so I've ordered a replacement. The ULN activates by pulling the row TIP107's to ground, which seems likely in case of a short circuit or similar. We shall see. 

On the other hand - input and output are all up and running and running "very often". I haven't crunched the actual numbers, but it should be in the 500-600Hz range at least. The graphics are a rock solid 60hz (or so, there's no noticeable blinking which would suggesting a minimum of 50hz ) and it doesn't matter if the drawbuffer takes 1 second to create itself, it won't affect solenoids, switches or graphics etc. This means I can most likely use several layers of DMD animations, for instance, one background and one foreground. Should be pretty wicked!

1) Here's a snapshot of my Enterprise Commercial Grade Ultra Deluxe Setup 2000. Still, the various shades
does make a huge impact on the graphics. Looking forward to getting SD card animations up and running!
I'm quite satisfied that there's absolutely no delay anywhere in the code. When the DMD is crunching bits into its registers, the MCU is processing switches/lights etc. The result is a nice double buffered screen in 16 shades and super responsive inputs/outputs. The setup even allows for "autonomous" triggering of slingshot, bumpers and flippers with microsecond delays instead of 15-20 ms previously.

Overall I'm very pleased with the progress thus far!

Tuesday, July 18, 2017

Get the jig' with it!

Not a "proper" update, really, but I've attached the PCB, screen and PSU to a spare piece of plywood which allows for easier handling and development. All necessary connectors are reachable as well, so I'll be able to hook up I/O and even solenoids to test things as well.

Since I am developing outside the box (no pun intended) this will help a lot to keep things tidy.

1) Piece of scrap plywood with components attached. Not much to say really. ;)

Monday, July 17, 2017

Pixels be rollin'...

It is with immense satisfaction the first few pixels has been drawn with the new motherboard!

Everything is very basic and the frame is currently hardcoded in 8 shades, but runs well in 16 as well (it's slightly difficult to see without having a proper image though). But it is running the new render routine with interrupt transfers and as a CoreTimer service.

1) Motherboard and DMD, sitting in a tree... The "pulsing" effect on top and bottom rows are simply
8 different shades being drawn. The timing of each color has not yet been adjusted and the screen overlay
is not in place either, which dims pixels and thus make each shade more pronounced.


I'll have to redo the main project file as well, as the one I did the PCB-tests on no longer works. I don't know why and haven't really investigated - now I can implement each section properly and without any guess work instead.

Next I'll get some basic DMD functionality in place before going on to other components.

Friday, February 10, 2017

All Things Start Small

For the past days, I've been able to test most of my planned circuit board on a breadboard, along with some very basic rewrites of the libraries.

I'm happy to say that I've encountered no problems with the design or code so far, which is in no small part thanks to Majenko on the Chipkit forums for supplying a very readable overview of the I/O pins of the Max32. Of course, this information was available in the datasheet, but he simply presented it in a way the Digilent people really should have done from the start. Super awesome and did indeed explain why I had some trouble in the past! 

1) Image courtesy of Majenko, hopefully it's alright to post it here. Red/orange buttons with white labels are non-exclusive pins and will conflict with the others if used. Green are alternate names and purple ones are unique. Interrupts, SPI and I2C are shown as well.  

As for code, I've designed both DMD and SD reading to run via interrupts, meaning that while the DMD is receiving data or the SD card transmitting the MCU is free to process other stuff.

For me that means I can handle I/O and solenoids at the same time as a row is being rendered (most likely with a ratio/factor since there's no point in updating switches at 14KHz). It also means I can process SD card data simultaneously as I'm building the render buffer instead of waiting for data to be ready, locking the game loop until done, and then building the frame...

I'm thinking that since the hardware will most likely be rolling a lot of thumbs now, I've upped the artwork to use 16 colors instead of 8. I also did a few tweaks to the Python scripts that generates the artwork and found a lot that could be optimized, leading to some pretty nice results:

2) Top: Old generator.  Bottom: New generator.
The old version didn't really under perform here, but there are way more troublesome images in the library. Like this one:


3) Top: Old generator. Bottom: New generator.

Some videos and images will probably need to be handled separately (i.e with non-default options) but ultimately this means that material that was about to get removed might now be inserted instead.  It all depends on how it looks in the machine of course as previews are good and all, but if it looks like crap in the machine it's got to go. :) 

I haven't hooked up the screen to my breadboard, so I cannot test it for real just yet - but in theory it should run at very acceptable refresh rates since the SD card load only increased 25% (3bit -> 4bit and has been heavily optimized now) along with the fact that the rendering doesn't block the MCU anymore.  

Awesomesauce!


Monday, August 31, 2015

Major Code and Sgt Refactor

So...
I haven't gotten the motivation yet (damn weather!) for soldering the new light cables, but I have spent some time with the code the last days. Figured I could do something better than what was in place.

Said and done -
Previously the code was run sequentially and always in the same order. This has now been changed to be done via interrupts instead. I am drawing line by line, layer by layer, and it works great!

I've also sacrificed a little RAM for speed/comfort by adding a backbuffer. While the display is blazing away as fast as it can from the drawbuffer (i.e frontbuffer), all new drawings occur on the backbuffer. When the buffer is finished it simply redirects the current line-pointer to the other buffer and the display never knew what happened. I've tried this in the past, but I never got the flickering to go away. I realized I was going about it the wrong way - there's no need to restart the drawing from the top whenever the content changes. I'm already drawing the screen line by line times eight so nobody would notice really. I was also previously stalling the rendering for buffer creation due to the sequential handling and that caused flickering too. But by avoiding the above and rendering with double buffers, interrupts has given me a rock solid 60 fps screen that is flicker free and brighter than it's ever been. Best of all - it's fixed fps, so it will never dip below this. Ever.  

I've also moved solenoid and switch handling into the very same line-drawing-routine, except that I only process information from these once 32 lines has been drawn (i.e at vertical blank, like the good old days). This has almost given me a 100-200x frequency on I/O without causing any flickering!

This is extremely good news as this means less chance of a missed switch hit or a solenoid firing too long. Previously, if the rendering and SD-card loading took 30ms, that was 30ms that couldn't be spent on anything - i.e a switch hit would not be registered during that time. That is remedied now thou and just to be extra sure I rewrote the switch code to be 4-5x faster as well. Turned out that piece of code still used the old and slow digitalWrite-code, but I took care of that. 

Furthermore - with the changes above the logic loop didn't have to be running as fast as possible. So I've locked the game logic to 40Hz, including SD-card reading, buffer creation, transitions etc. I did a little counting and found that it never dipped below 42 Hz (this is all done on the machine's "spare time" now, mind you), so I lowered it a little extra for safety. A fixed rate means no surprises to game logic and the frame is guaranteed to be finished in time. Should it not be, however, the double buffering will prevent any flickering - which is always nice!

For the record.
I've tried using interruptTransfers in the DSPI-library, but they refuse to work for me due to trouble with the Max32 board definition and conflicting hardware vectors. Ironically, I'm the one who reported the bug in 2013 and it hasn't (to my understanding) been fixed yet...

Anyhow - had that been fixed I could have load animation data and sending data to the display "in the background" and go about my business the usual way. My way works just the same, but different.

Finally, I wrote a script to remove the initial two bytes of junk from wav-files. However, as I didn't read up on the wav-format, the files ended up being the correct size but not valid wav-files. Instead of working around it I simply powered through and converted the 636 sound files (will they all be used anyway?!) manually. That was joyful, for sure, but now the audio seems to be working fine. Still need to convert the old audio routines into new ones and decide on a sound priority/scheduling scheme.

Baby steps...

Saturday, May 16, 2015

74 000

74 000 video frames has been compiled into a single video master file today.
Who knew a pinball machine could have that many frames of animation... but then again, this machine is not your average run of the mill machine. It's truly one of a kind. ;)

I'll try to get started on the new lightboard this weekend. Work's been going real slow on that one so far with the flu, tour and time off needed to regain some energy. But soon I hope I'll be able to present some nice news for you all!


Friday, May 3, 2013

Dot Matrix Disorder

Finally got a good workflow in designing DMD-animations now.

The original plan was to use Flash to create sequences as I've seen a couple of people do on the internet, but the user interface is horrible. Downright awful.

So now I'm back to using proper video editing programs instead which is a much nicer experience!
Maybe it's because I'm used to it - but basically it took me a couple of hours to generate a simple video using Flash compared to just a couple of minutes using video editing. Not to mention the horror of altering something...

I've also got more or less a 100% preview possibility with a DMD-emulation "filter" than I've created, including properly pixelating the image and bit-crunching it. Can't argue with realtime feedback!
Now I'll just have to find a decent VFX library for smoke, explosions and lightning...

Oh, the irony of using high end video editing software, plugins and HD movie material to generate a 128x32 pixel sized 3-bit image sequence...

Friday, September 7, 2012

That "behind the scenes" stuff...

Been focusing on getting the codebase up to date and functioning as I would like.
Slowly getting there.

For one -
I've redesigned almost the entire code bank from scratch.

So what I've got now is a state machines for each player state along with separate states for the various maintenance views and idle loops. Works like a charm and VERY flexible. I've got most (if not all) of the player states pinned down including bonus, highscore, ball saved, match sequence etc. And of course - multiplayer.

It is at the moment entirely possible to "play" a complete single- or multiplayer game from inserted credit to game over (or highscore), but the actual gameplay logic is not yet started. I've still got some electrics and hardware things to do...

Here's a teaser pic of the current state -
Animated streamed video, multiple layers of text/images, transparency, transitions, effects...


In my humble opinion, I believe this easily matches the quality of commercial pinball DMD rendering!

One guideline I'm following is that there should never be a time where the graphics is just switched on and off - each transition should be handled fluently and text should not just pop into place, but rather fade (but fast) into place. That particular effect creates a modern feel to it and I hope that the overall impression will surpass most peoples expectations!

If there's RAM and flash available when logic is complete, I'm think about inserted some realtime generated water effects onto the display as well - staying true to the Bioshock realm.

I've also spent time creating the tools to burn and generate my SD disc image.
My tool simply recursively loops through all files in a folder and packs the DMD files together into one big file with a reserved 51200 byte space in front for machine settings and highscores. An "anims.h" header file is created and updated so all I need to do is to run a recompile of the Chipkit program and reseat the SD card and the animations are updated.

If only the actual data has changed and not the start/stop sectors no reprogram is needed. This allows for quick and easy previewing in the pinball machine since the SD card library has been recreated to support hot-swapping of cards as well.

I've also written a readdmd.py script that can read directly from the packed image (or a regular DMD file) and show the frame at that position. Really handy when debugging and developing.

Pretty neat!

To compare an older image with the current, you can see that it's much closer to the expected output compared to the old image - which I also commented on in the older entry.

2) Old version: All colors were to washed out, not enough contrast. 
3) New version: Nice contrast between high and lows.
Taken at an angle, but with a nice red color and... 
4) ...when compared to the source image, pretty close. This means I get more or less
an accurate preview on the file before 'burning' the SD-image.

Wednesday, May 9, 2012

DMD progress so far

Revised the DMD code a little today and thought it would be fun to see how far I've come the past months. The current DMD state is as follows:

* Streaming fullscreen animations with up to 40 fps from the SD card
* Graphics library with two types of texts and box/line drawing
* Multilayered - combine several layers of graphics before drawing
* Runs at 110-130 Hz, 8 shades of color


Again - the cellphone camera does not do the screen or animation justice. Also, the example animation in the video is a little messy and runs a little too fast to be pleasant. When making the final animations each needs to be tailored so that each animation looks good on the DMD, regardless if the movement becomes too slow or fast in comparison to the original clip. It's all about the end results! 

I've prepared around 80 shots of animations not counting static images and custom menus etc. I have not yet created any final DMD animations. The process is slow and tedious, that's for sure!


For comparison - this is how the DMD rendering looked a couple of months ago (on a PinLED display):


Although the framerate was pretty solid at around 100-150 frames at that time, there was no loading of images or multishading. It was all just one frame prebuilt and displayed in a single shade as fast as possible.

The new DMD-code is a LOT faster - if I would have the same setup with the new code, the display would potentially update at far above 1000 Hz. (The screen caps at around 200 Hz according to the specs). It's the SD card loading and, to a point, the frame rebuilding that takes time.


The annoying bit-packing bug is still apparent, to my dismay. I can't seem to figure out what the problem is, since the packing/unpacking looks fine on the computer, and the correct amount of bits and bytes are there. It shouldn't be a problem with the SD card library either, since the same code works fine when loading an unpacked DMD-file.

Sunday, May 6, 2012

Image formats and whatnots

I reprogrammed my converter for the DMD animation to only support PNG-series instead of animated GIF's for several reasons, including -
* Each image is independently adjustable
* I have a lot of trouble finding software for Mac that can create animated GIF's
* The GIF-files can only have 256 colors, which means inevitable dithering of the source files

I believe this is also the way the P-Roc handles its conversion. It would be cool to know if they choose this path as well for the reasons I mentioned above.

Basically you enter "python convert.py foldername" and it reads all files in that folder, bakes it into a custom DMD format and stores a debug image of each frame in a debug folder inside the same dir. Very clean and a lot more flexible than animated GIF's.

I also added a brightness filter before each conversion so that the rather dark images will be pushed up into a more suitable range for the DMD to display. It could mean loss of the finer details, but I guess I'll have to experiment on this.

For example, this is with added brightness:


And this is the same image without:

A lot better, right?

However - compare these two...


There's clearly some unwanted artifacts caused from the brightness pushing, but the actual movie data looks a lot better with it activated. Oh, the decisions!